


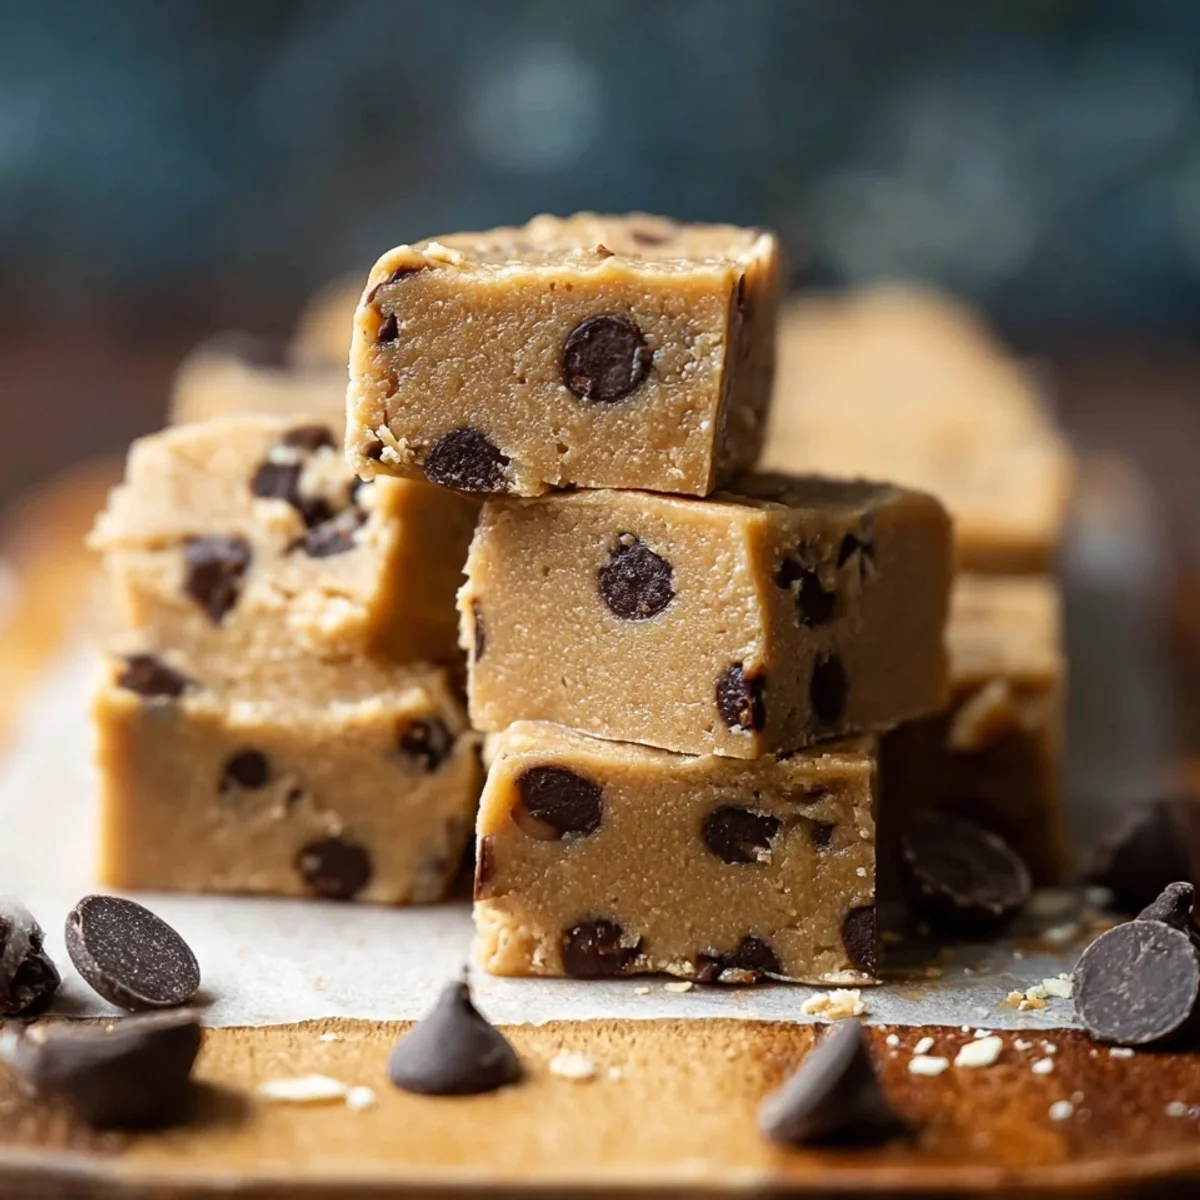
Whip up delicious high protein no-bake cookie dough bars. An easy, satisfying snack or post-workout treat, packed with flavor and protein.
I remember those days, always craving something sweet but trying to stay on track. My post-workout snack game was weak, honestly. Then, one afternoon, I was staring at a tub of protein powder and a half-eaten bag of chocolate chips, and it hit me! What if I could combine my love for raw cookie dough with a healthy punch? That's how these no-bake protein bars were born. They've been a total lifesaver, a true game-changer in my snack arsenal. You're gonna love 'em!
Oh, the first time I made these bars, I forgot the almond milk. The 'dough' was so crumbly, it was just sad! I tried to press it into the pan and it just fell apart. 'Oops!' I thought. Had to scoop it all back into the bowl, add the milk, and re-mix. Lesson learned: wet binders are key for that perfect, sticky dough consistency!
The Good Stuff: Ingredients for Your Cookie Dough Protein Bars
- 1 1/2 cups Rolled Oats: These are the unsung heroes, giving our cookie dough protein bars that classic, chewy texture. I love how they bulk up the bars, making them super filling without weighing you down. Plus, they're a great source of fiber. Don't go for instant oats here, you want the heartier rolled kind to really hold everything together and give that satisfying bite.
- 1 cup Vanilla protein Powder (whey or plant-based): This is where the 'protein' in our cookie dough protein bars comes from, obviously! I always use vanilla because it plays so well with the other flavors, giving that warm, comforting base. Whether you're a whey fan or prefer plant-based, make sure it's a flavor you actually enjoy, because you'll taste it! It's the muscle behind the magic.
- 1/2 cup Almond Flour: Almond flour brings a lovely tenderness and a slightly nutty flavor that just elevates these bars. It helps create that smooth, melt-in-your-mouth cookie dough texture we're chasing. I've tried it without, and honestly, the bars felt a little too dense. This flour lightens things up beautifully, making each bite feel more luxurious.
- 1/4 cup Brown Sugar Substitute (e.g., erythritol blend): This little gem gives us that classic brown sugar sweetness without all the extra calories. I've experimented with a few, and an erythritol blend works wonders here, mimicking that caramelized note. It's crucial for hitting that authentic cookie dough flavor profile without a sugar crash. A little goes a long way, trust me!
- 3/4 cup Creamy Natural Peanut Butter: Oh, peanut butter, my love! This is the glue, the flavor bomb, the creamy dream. Natural peanut butter (just peanuts and salt, please!) is what you want for the best texture and taste. It binds everything together and adds a rich, savory depth that balances the sweetness. I've tried other nut butters, but PB just hits different for these bars.
- 1/2 cup Maple Syrup: Beyond just sweetness, maple syrup adds a lovely, subtle warmth and helps with the binding. It's got a richer, more complex flavor than just plain sugar, which I think makes these bars feel extra special. Plus, it's a natural sweetener, which always feels good. It works hand-in-hand with the peanut butter to create that perfect sticky dough.
Whip Up Some Magic: How to Make These No-Bake Bars
- Combine Dry Ingredients:
- First things first, grab your biggest mixing bowl! We're tossing in the rolled oats, protein powder, almond flour, brown sugar substitute, and that tiny pinch of sea salt. Give it a good whisk until everything looks evenly distributed. You want to make sure all those powdery bits are friends before the wet stuff comes in. This forms the foundational dry mix for our amazing no-bake treats.
- Mix Wet Binders:
- In a separate, microwave-safe bowl, gently warm up your peanut butter and maple syrup for about 30 seconds. This makes them super smooth and easy to mix. Stir in the almond milk and vanilla extract until you have a creamy, fragrant concoction. This wet mixture is the magic glue that's going to transform those dry ingredients into something spectacular.
- Form Dough Base:
- Now for the fun part! Pour your warm, wet mixture into the dry ingredients. Get in there with a sturdy spoon or even your hands (my preferred method, honestly!) and mix, mix, mix. It'll start off crumbly, but keep going. Soon, it'll come together into a thick, glorious dough that smells exactly like raw cookie dough. This is the heart of your cookie dough protein bars!
- Fold in Chips:
- Time for the best part chocolate! Gently fold in those mini semi-sweet chocolate chips. You want them distributed throughout, but try not to overmix, or they'll get all melty and messy. The little bursts of chocolate are what make these cookie dough protein bars feel so decadent and authentic. Every bite will be a chocolatey dream!
- Press into Pan & Chill:
- Grab an 8x8 inch pan lined with parchment paper a little overhang helps for easy lifting later. Press that beautiful dough firmly and evenly into the pan. Really push it down to compact it. Then, pop it into the fridge for at least 2 hours. This chilling time is non-negotiable, it helps the cookie dough protein bars set up perfectly. Don't skip it!
- Add Chocolate Topping & Set:
- Once chilled, melt some extra chocolate chips with a tiny bit of coconut oil until smooth. Drizzle or spread it over your bars. If you're feeling fancy, sprinkle a few extra mini chips or a pinch of sea salt on top before it sets. Back into the fridge for another 30 minutes, and then slice 'em up! Pure perfection, ready to be devoured. These cookie dough protein bars are worth the wait!
Making these bars always feels like a little kitchen therapy. There's something so satisfying about watching all those simple ingredients come together into a sticky, fragrant dough. The best part? No oven! Just mixing, pressing, and waiting for that blissful chill. It’s a low-stress, high-reward kind of recipe, perfect for a relaxed afternoon.
Keep 'Em Fresh: Storage Tips for Your Protein Bars
Once these beauties are sliced, I like to store them in an airtight container in the fridge. They'll stay fresh and perfectly chewy for up to a week. Honestly, they rarely last that long in my house! I've made the mistake of leaving them on the counter once, thinking 'oh, it's cool enough,' and ended up with slightly too-soft bars still tasty, but not that firm, satisfying bite I love. For longer storage, you can freeze them for up to a month. Just pop them into a freezer-safe bag with parchment paper between layers to prevent sticking. Thaw them in the fridge or on the counter for a quick snack!

Mix It Up: Substitutions for These Delicious Bars
I've played around with so many variations! For the protein powder, chocolate protein works wonderfully if you want a double chocolate vibe just make sure it's a flavor you enjoy. Nut butter-wise, almond butter or cashew butter are fantastic alternatives to peanut butter, they give a slightly different, milder flavor. Just ensure they're natural and creamy. Maple syrup can be swapped for agave nectar if that's what you have. I've even tried a mix of regular sugar and a touch of molasses for that brown sugar depth when I ran out of substitute, which worked pretty well! Feel free to get creative with the mix-ins too, white chocolate chips, chopped nuts, or even a sprinkle of shredded coconut could be fun.
Serving Up Smiles: Best Ways to Enjoy Your Protein Bars
Okay, how do I eat these? Let me count the ways! My favorite is straight from the fridge, slightly chilled and firm. They're perfect as a post-workout refuel, a mid-morning pick-me-up with a cup of coffee, or a guilt-free dessert after dinner. Sometimes, I'll crumble one over a bowl of Greek yogurt for an extra protein boost and some delicious texture. My kids even love them warmed slightly in the microwave for a few seconds, turning them into a gooey, melty treat though that makes them a bit messier! They're also amazing packed in lunchboxes for a wholesome school or work snack. Seriously, they're versatile AF.
More Than a Snack: The Story Behind These No-Bake Treats
The idea of 'cookie dough' as a treat itself really took off in the 80s, especially with the rise of raw cookie dough ice cream. Before that, it was just something you snuck from the bowl! Combining that nostalgic, comforting flavor with the modern health trend of protein-packed snacks feels like a natural evolution. For me, it taps into that childhood joy of licking the spoon, but in a way that aligns with my adult goals of staying energized and feeling good. It's a testament to how we can adapt classic comfort foods to fit our lifestyles, making something familiar feel fresh and exciting. These bars are my ode to that journey!
And there you have it, friends! My go-to recipe for a snack that tastes like a cheat day but keeps you feeling amazing. These bars have brought so much joy (and protein!) into my life, and I really hope they do the same for you. Give them a try, play with the flavors, and don't forget to tag me on social media or leave a comment below with your creations. Happy snacking!

Burning Questions? FAQs About Our Cookie Dough Protein Bars
- → Can I use a different protein powder?
Yep! Just make sure it's a flavor you like, as it'll come through. Chocolate or unflavored would work great too. Some brands absorb liquid differently, so you might need a tiny splash more almond milk if your dough feels dry.
- → How do I make these vegan?
Easy! Just ensure your protein powder is plant-based (like pea or soy protein) and your chocolate chips are dairy-free. Everything else in this recipe is already plant-based, so you're good to go!
- → Can I skip the brown sugar substitute?
You can, but the flavor won't be as rich and 'cookie dough-like.' You could use coconut sugar for a natural option, or just skip it for less sweetness, though the texture might be slightly different.
- → Why are my bars falling apart?
Most likely, your dough wasn't pressed firmly enough into the pan, or it didn't chill long enough. Make sure to really compact it down, and give it at least 2 hours in the fridge to set up properly.
- → What if I don't have almond flour?
You can try using oat flour (just blend some rolled oats until fine) for a similar texture. Whole wheat pastry flour might also work in a pinch, but almond flour gives that special tenderness.
High Protein No-Bake Cookie Dough Bars
Whip up delicious high protein no-bake cookie dough bars. An easy, satisfying snack or post-workout treat, packed with flavor and protein.
Ingredients
The Cookie Dough Core
- 1 1/2 cups Rolled Oats
- 1 cup Vanilla Protein Powder (whey or plant-based)
- 1/2 cup Almond Flour
- 1/4 cup Brown Sugar Substitute (e.g., erythritol blend)
- 1/2 tsp Fine Sea Salt
Rich & Sweet Binder
- 3/4 cup Creamy Natural Peanut Butter
- 1/2 cup Maple Syrup
- 1/4 cup Unsweetened Almond Milk
- 1 1/2 tsp Pure Vanilla Extract
Chocolatey Finish
- 1/2 cup Mini Semi-Sweet Chocolate Chips
- 1 tbsp Coconut Oil (for melting chocolate)
- Pinch of Flaky Sea Salt (for garnish)
Instructions
-
1Combine Dry IngredientsIn a large bowl, whisk together 1 1/2 cups Rolled Oats, 1 cup Vanilla Protein Powder, 1/2 cup Almond Flour, 1/4 cup Brown Sugar Substitute, and 1/2 tsp Fine Sea Salt. This forms the essential dry base for your No-Bake Cookie Dough Protein Bars | High Protein Snack.
-
2Mix Wet BindersIn a separate medium bowl, combine 3/4 cup Creamy Natural Peanut Butter, 1/2 cup Maple Syrup, 1/4 cup Unsweetened Almond Milk, and 1 1/2 tsp Pure Vanilla Extract. Whisk until smooth and well-combined, creating the rich, sweet binder for the bars.
-
3Form Dough BasePour the wet mixture into the dry ingredients. Mix thoroughly with a spatula or your hands until a thick, uniform cookie dough-like consistency forms. Ensure all dry ingredients are fully incorporated to create the perfect base for your No-Bake Cookie Dough Protein Bars | High Protein Snack.
-
4Fold in ChipsGently fold in 1/2 cup Mini Semi-Sweet Chocolate Chips into the dough. Distribute them evenly throughout the mixture, ensuring every bite of your high-protein snack has a delightful chocolatey burst.
-
5Press into PanLine an 8x8 inch baking dish with parchment paper, leaving an overhang on the sides. Transfer the cookie dough mixture into the prepared pan and press it down firmly and evenly using a spatula or your hands.
-
6Chill DoughPlace the pan in the refrigerator for at least 30 minutes to allow the bars to firm up. This chilling step is crucial for easy slicing and helps set the structure of your No-Bake Cookie Dough Protein Bars | High Protein Snack.
-
7Add Chocolate ToppingIn a microwave-safe bowl, melt 1/2 cup Mini Semi-Sweet Chocolate Chips with 1 tbsp Coconut Oil in 30-second intervals, stirring until smooth. Drizzle the melted chocolate evenly over the chilled bars.
-
8Garnish and SetSprinkle a pinch of Flaky Sea Salt over the chocolate topping immediately. Return the pan to the refrigerator for another 15-20 minutes, or until the chocolate has fully set. Once firm, lift from the pan and slice into 12 bars.
Notes
Store these No-Bake Cookie Dough Protein Bars in an airtight container in the refrigerator for up to 1 week, or freeze for longer storage (up to 1 month).
The type of protein powder can affect texture. Whey tends to make them a bit softer, while plant-based might be firmer. Adjust almond milk slightly if needed.
Feel free to substitute peanut butter with almond butter or cashew butter for a different flavor profile, ensuring it's creamy and natural.
For an extra boost of flavor, you can add 1/4 tsp of almond extract along with the vanilla extract in the wet ingredients.
Equipment
Please check ingredients for potential allergens and consult a health professional if in doubt.
Nutrition Facts
It is important to consider this information as approximate and not to use it as definitive health advice.
Comments
Leave a Comment